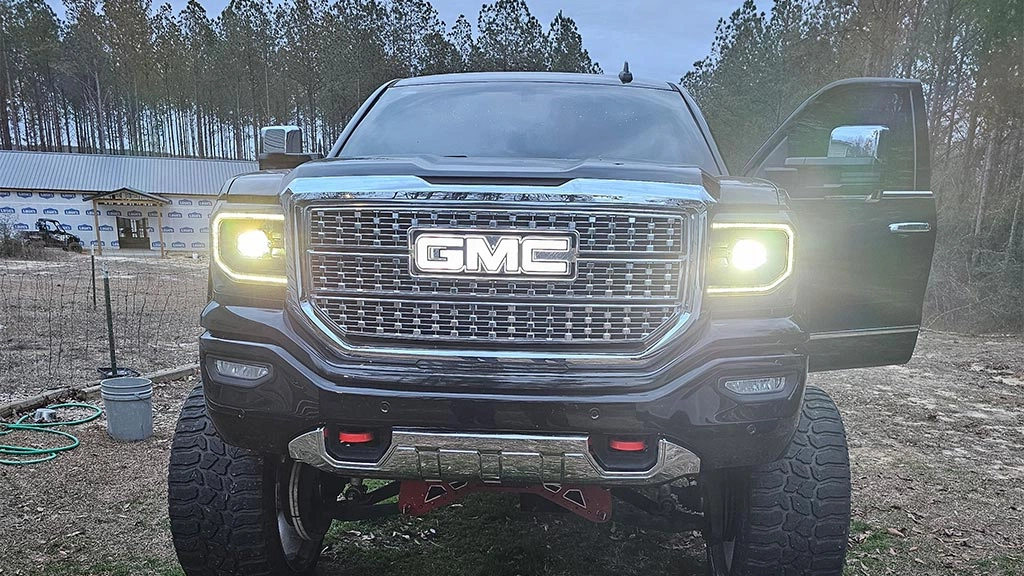
Have you ever thought about adding a touch of uniqueness and style to your car? One way to do so is by installing an light up emblem, which not only adds a cool factor to your vehicle but also makes it stand out on the road. In this blog post, we will discuss the different types and prices of illuminated GMC emblems available, as well as the two main methods of installation – without removing the GMC front grille and by removing the GMC front grille.
How to choose a lighted GMC emblem?
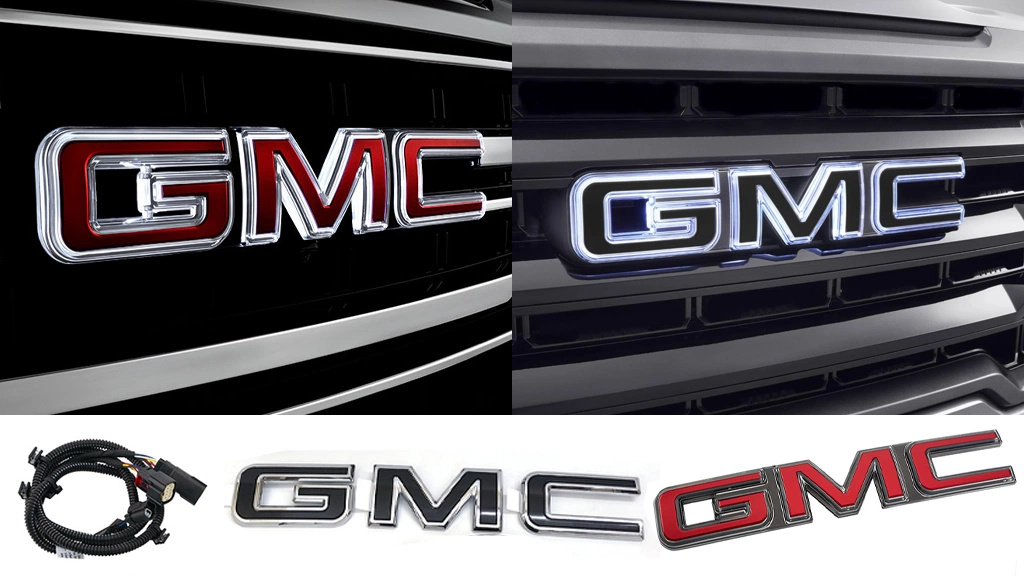
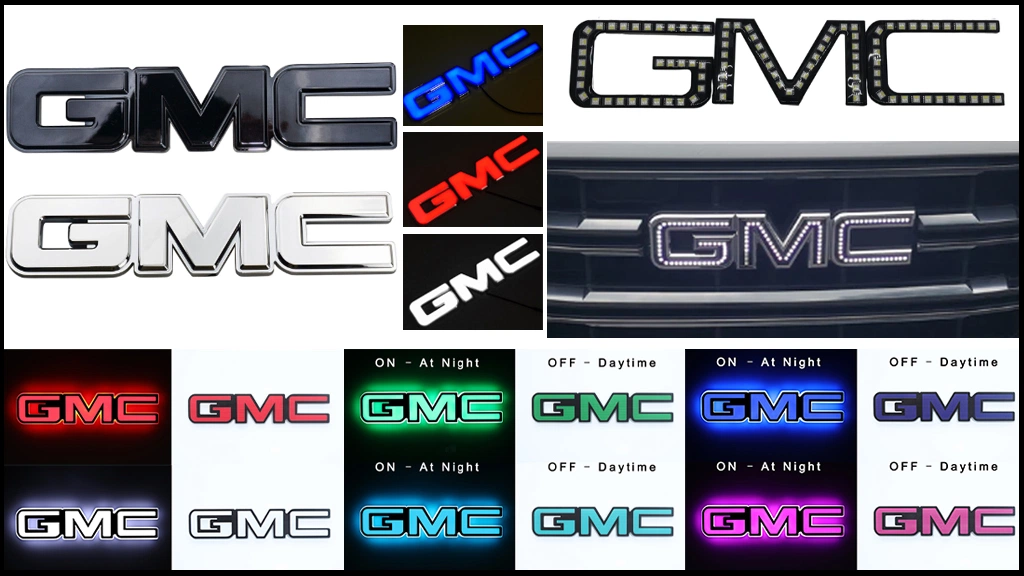
GMC lighted grill emblems come in various designs and prices, allowing you to choose one that fits your style and budget. Whether you prefer a simple and sleek design or a more elaborate and eye-catching emblem, there is something for everyone in the market.
When purchasing OEM/factory LED GMC badges online, the price typically ranges from $300 to $500. Given a sufficient budget, the OEM LED GMC badge is undoubtedly the best choice. It boasts a delicate and attractive appearance, equipped with a plug-and-play wire harness, eliminating the need for a complex wiring process.
For those with a limited budget, alternative types of lighted GMC grille emblems are available, albeit requiring a more complex installation process. However, they offer a wider range of options in terms of styles, colors, and more budget-friendly prices, mostly around $100. Users can design their own wiring schemes, but this requires a certain level of electrical skills for installation.
How to install the illuminated GMC grille emblem
When it comes to installation, there are two main methods to consider. The first method involves removing the old GMC emblem without taking off the front grille. While this method is quicker and more convenient, it may result in damage to the old emblem. The second method requires removing the front grill to safely take off the old emblem without causing any harm to it. Although this method is more labor-intensive, it allows you to preserve the old emblem for future use.
Important Note: Upon receiving the new car emblem, it is crucial to check its functionality to prevent the situation where the old emblem is removed only to discover defects in the new one.
Tools:
Flat pry bar / Slotted screwdriver, plastic scraper, Adjustable wrenches, Utility knife, Screwdrivers, Telescoping wheel lug nut wrench, Electrical tape, Towel, Detergent
A. How to remove the old GMC badge without taking off the front grille?
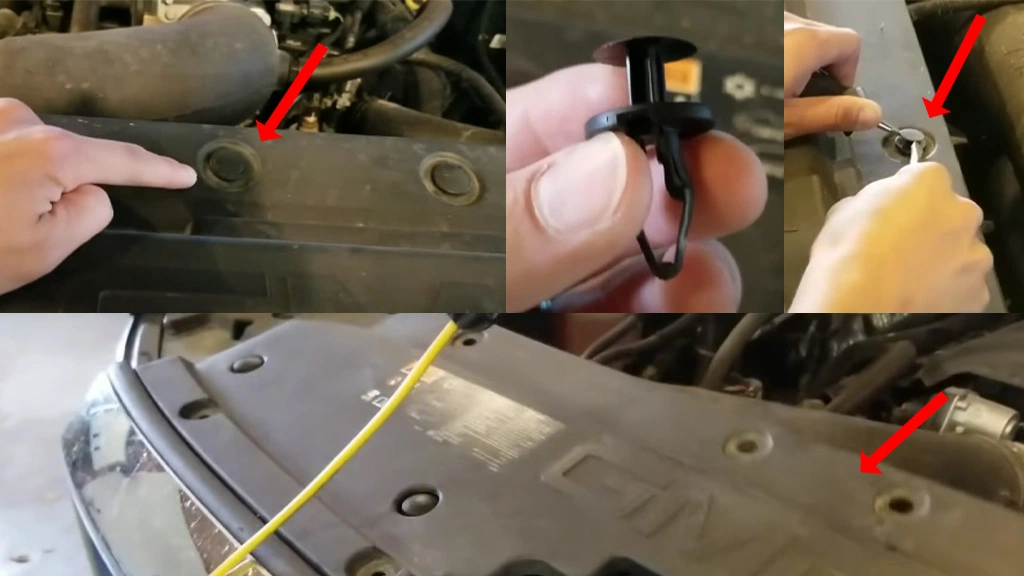
- Locate all the fixed screws and clips of the radiator support access cover, unscrew them, and remove the cover. (Remember to keep the screws safe to avoid misplacement.)
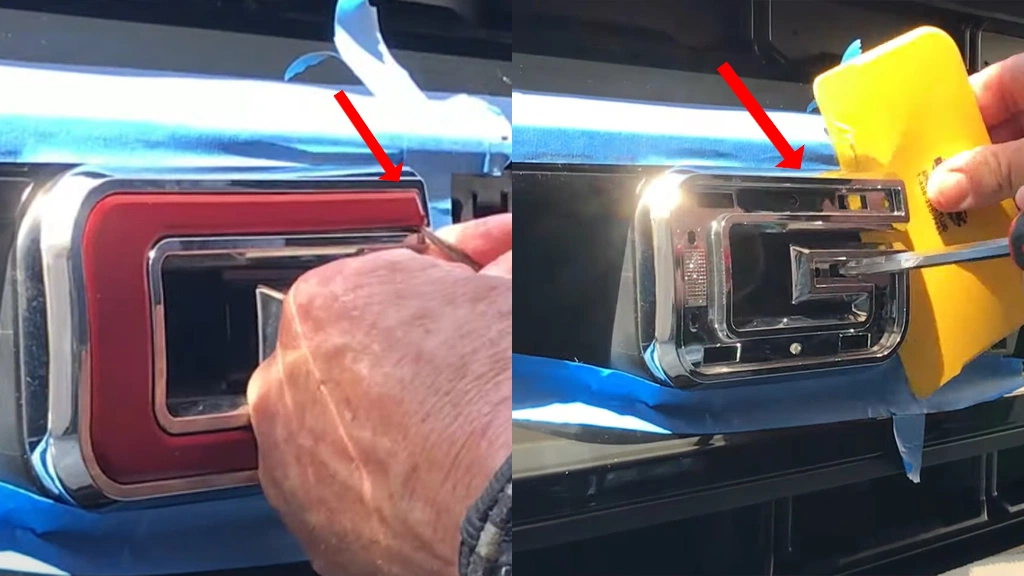
- Using flat pry bar or slotted screwdriver, dismantle the red part of the emblem. It is best to start prying from the end of the logo and put adhesive tape or a towel around the car badge on the grill to prevent scratching the grill when prying off the car badge.
- Pry off the chrome part and insert a plastic scraper, then pry the clips from the holes and remove the whole chrome logo.
- Clean the emblem area.
B. How to remove the GMC front grille and then safely remove the old emblem?
The basic steps for removing the front grille are almost the same for any GMC model. For more detailed disassembly instructions, it is recommended to directly search for related videos on YouTube.
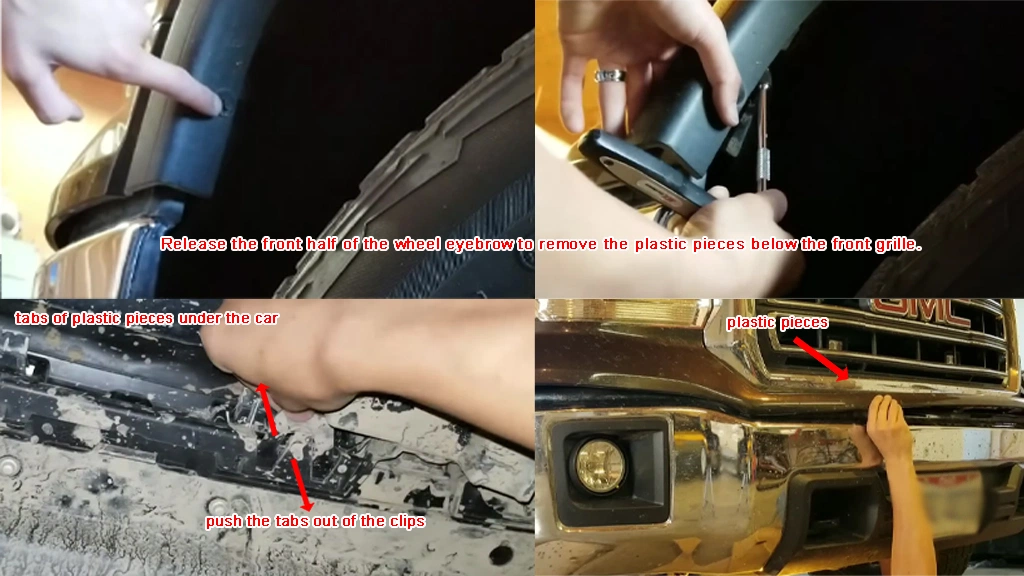
- Start by removing the push pins on the radiator support access cover and then take out the cover.
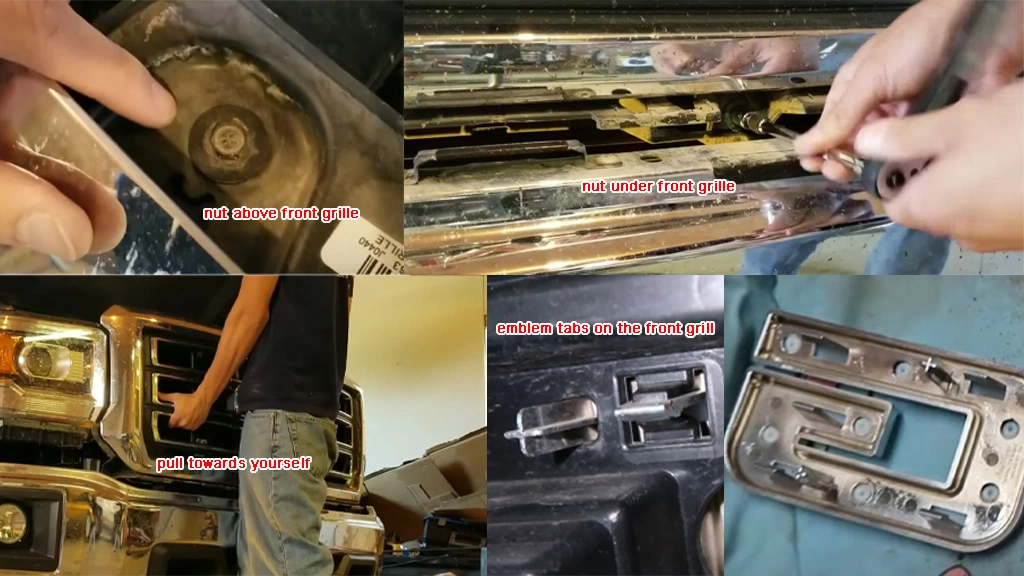
- Locate all the nuts, push pins, and tabs that secure the front grille. If there are radars or cameras, be careful not to damage them, and disconnect their harnesses at the appropriate time. Perhaps we don’t need to completely remove the grille, just create enough space to work with. Be careful not to scratch the front grill or the vehicle.
- Find the emblem; you will see tabs, pop them out to safely remove the entire old emblem.
How to wire the LED GMC grill emblem?
Once the old emblem is removed, the next step is to wire the illuminated emblem properly. This process typically involves connecting the emblem to the car’s electrical system to ensure that it lights up as intended. It is essential to follow the manufacturer’s instructions carefully to avoid any electrical issues or malfunctions.
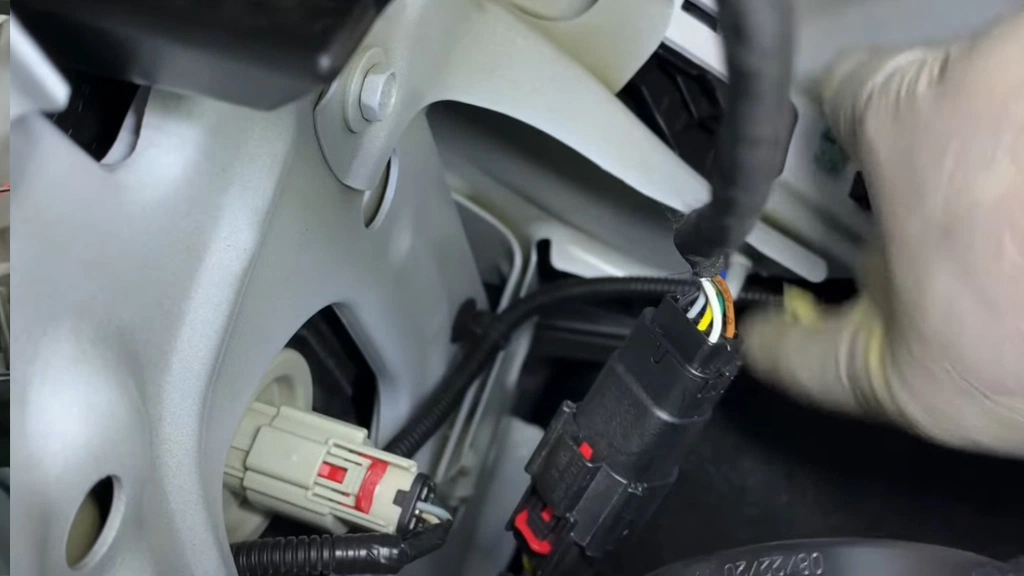
Installing the OEM LED GMC badge is very simple. Thread the wiring harness through the reserved holes, pass it through the grille into the engine compartment, and then connect it to the low beam headlight plug. Secure the wiring harness with the clips provided or use additional zip ties to secure it in place. The emblem is fixed to the front grille with tabs.
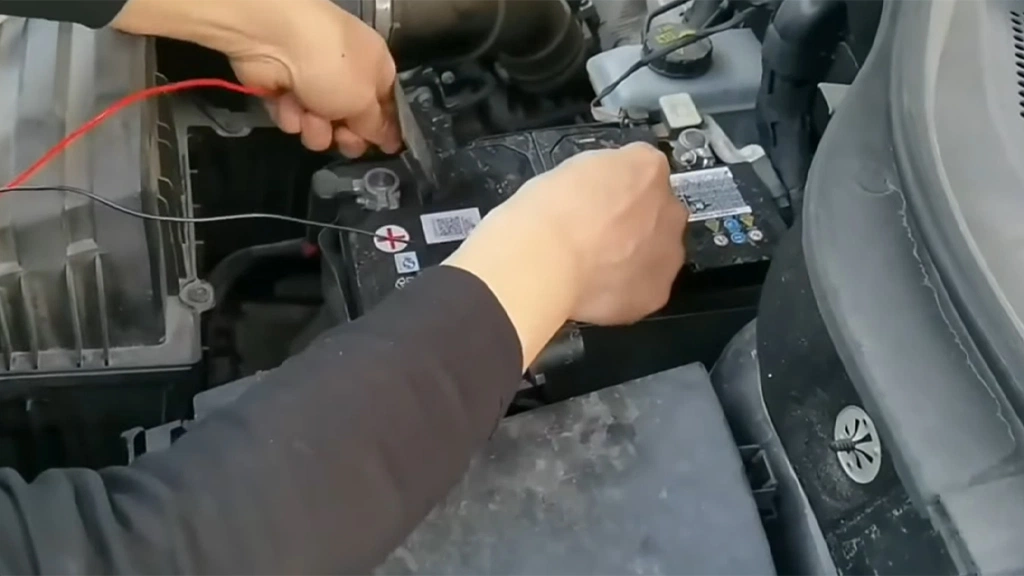
The non-OEM LED GMC badges wiring is more complex. First, determine the wiring plan, such as connecting to the headlights, daytime running lights, fog lights, car fuse box, etc. Once the wiring plan is established, identify the correct wires, then proceed with the installation by cutting and connecting the wires, wrapping them with electrical tape. Use zip ties to neatly secure the entire wiring route. Follow the product instructions to properly fix the badge light in place.
GMC light up emblem installation video feedback from the customer of RgbEmblem.
In conclusion, Installing a GMC grill emblem light is a fun and rewarding way to customize your vehicle. The methods outlined in this blog post can be applied to most car models, but if you encounter any specific challenges, feel free to seek advice from fellow car enthusiasts online. Remember to enjoy the process and showcase your unique style on the road with a glowing GMC front emblem!

