

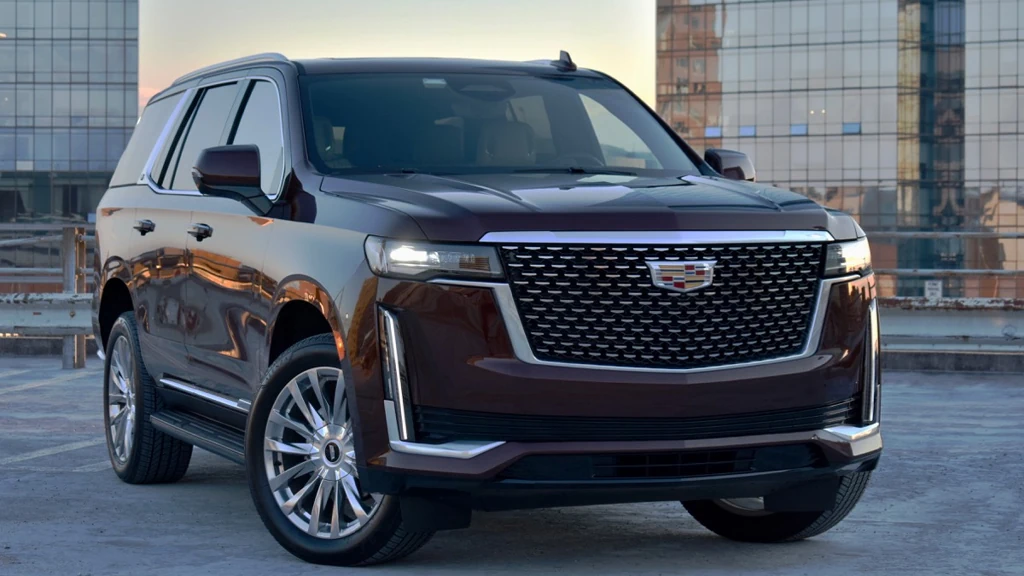
The Cadillac Escalade is already a statement of luxury and presence on the road. But for owners who want to elevate their ride to the next level, details matter. One of the most stylish and understated upgrades you can add is LED logo car inner door handle bowl trims—a subtle yet striking modification that transforms your Escalade’s interior every time you open a door.
If you’re ready to give your Escalade a custom, high-end look that stands out after dark, let‘s dive in.
Part 1: What Are LED Logo Car Inner Door Handle Bowl Trims?
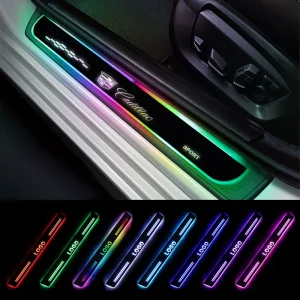
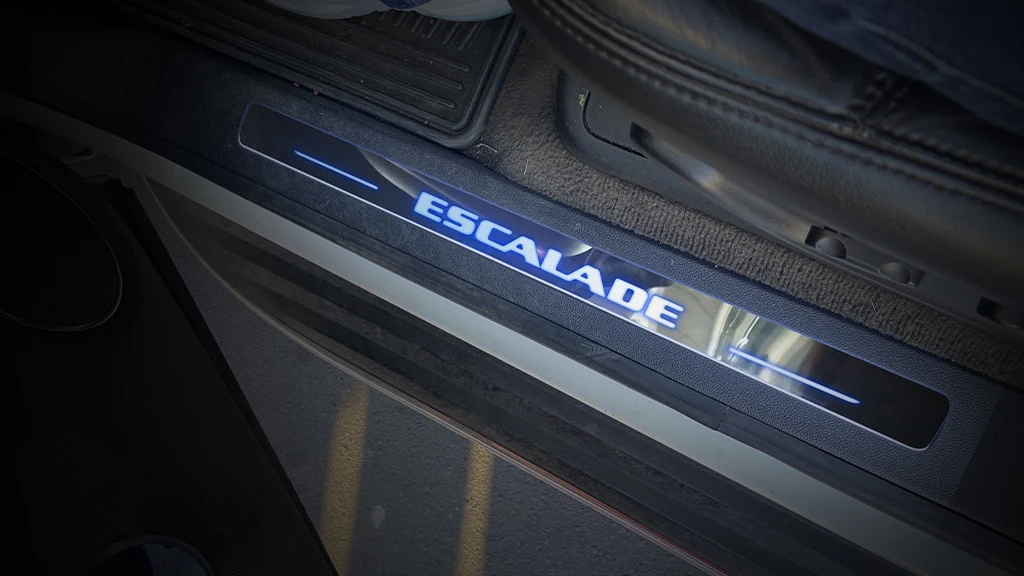
LED door handle bowl trims are custom-fit lighting modules designed to sit inside the door handle recess (often called the “door bowl” or “door pull cup”) of your vehicle. Once installed, they illuminate the area around the door handle with a soft, ambient glow—and optionally, they can project a custom logo directly into the bowl itself.
Most high-quality kits offer:
- Custom-fit design tailored to the shape and size of your specific vehicle’s door bowl to ensure a seamless fitment
- Multiple color options, including red, white, blue, orange, purple, green, and multi-color fade modes without remote control
- Customizable logo options, allowing you to display the Cadillac crest, your own name, a brand logo, or any custom pattern or text
- Low-profile acrylic construction with high light transmittance—smooth like a mirror for a premium, factory-like appearance
- 12V compatibility, designed to integrate with your existing automotive electrical system
The LED door bowl trim is not a replacement for your original door bowl—rather, it is designed to be directly pasted and installed on top of the OEM door bowl. This makes installation relatively straightforward, especially for DIYers with basic automotive electrical knowledge.
A small but important note: custom door bowl lights are generally designed for flat door bowls and may not fit 3D curved door bowls properly. Most Escalade models feature compatible flat bowl surfaces, but it’s always wise to check your specific vehicle before ordering.
Part 2: Why the Cadillac Escalade Is the Perfect Canvas for This Mod
The Cadillac Escalade has long embraced LED lighting as a signature design element. From its iconic vertical LED headlights and taillights to factory LED ambient interior lighting, the Escalade’s design language is built around light. In fact, the Escalade was one of the first vehicles where Cadillac used all-LED light sources for exterior lighting, and top configurations even come equipped with special LED lighting for the door handles.
In other words, adding illuminated door handle bowls to your Escalade isn’t an afterthought—it’s an enhancement that aligns perfectly with the vehicle’s existing design DNA. It takes what Cadillac started and brings it to the next level.
The Escalade’s generous interior space and premium materials also make it an ideal candidate for this kind of subtle lighting upgrade. Without overwhelming the cabin, LED door bowl trims add a layer of warmth and sophistication that complements the leather, wood, and metallic accents inside.
Part 3: Step-by-Step Installation Guide
Installing Cadillac Escalade LED door handle bowl trims is a moderately challenging DIY project. If you‘re comfortable working with basic hand tools and have some experience with automotive electrical systems, you can likely complete this in an afternoon. If not, professional installation is always a safe bet.
Here’s a general walkthrough based on common LED door bowl light kits and industry best practices. (Note: procedures may vary slightly depending on your Escalade‘s model year and the specific kit you purchase.)
Step 1: Gather Your Tools and Materials
Before you start, gather the following:
- LED door handle bowl trim kit (4-piece set, one for each door)
- Trim removal tools (plastic pry tools to avoid scratching panels)
- Screwdriver set (Phillips and flat-head)
- Wire strippers and crimpers
- Electrical tape or heat-shrink tubing
- Multimeter or test light (to verify power sources)
- Zip ties (for wire management)
- Optional: Drill with small bits (if your kit requires mounting holes)
Work in a well-lit, clean area, and consider disconnecting your vehicle’s battery before beginning any electrical work for safety.
Step 2: Remove the Door Panel
Use your trim tools to gently pop off the door panel. Start by removing the trim piece on the door pull, the black trim behind the door handle, and the window switch/power lock trim panel. Then remove any bolts behind the cover panels using an extension and socket.
Once all screws and clips are removed, pull on the plastic door panel from underneath to release the push-pin clips around the perimeter (typically about eight clips per door). Lift the panel off and set it on a flat, padded surface with the back side facing up.
Be patient during this step—clips can break if forced. Working slowly and methodically will prevent damage and ensure a clean reassembly.
Step 3: Prepare the Installation Area
Clean the door bowl surface thoroughly. Remove any dust, dirt, or residue so the trim adheres properly. If your kit includes adhesive backing, make sure the surface is completely dry before proceeding.
For kits requiring a wired connection, use a test light or multimeter to locate a suitable 12V power source inside the door, such as the courtesy light wiring, power window circuit, or night light circuit.
Step 4: Mount the LED Door Bowl Trim
Position the LED trim piece inside the door bowl to confirm fitment before securing it. Once satisfied:
- If using adhesive backing, carefully remove the protective film and press the trim firmly into place
- If the trim requires screws, use the appropriate screwdriver to attach it
- Route the wires carefully along the existing wiring harness or through interior gaps
Step 5: Connect the Electrical Wires
Most LED door bowl trim kits come with wire ends designed with pins that can be quickly inserted into a harness without needing to cut or break factory wires. Follow your specific kit‘s instructions for the best approach.
The general rule for any 12V automotive LED installation:
- Connect the positive wire (usually red) to a +12V power source (e.g., courtesy light positive terminal or door light circuit)
- Connect the negative wire (usually black) to a suitable ground
- Use heat-shrink tubing or electrical tape to insulate all connections
Many enthusiasts prefer to tap into the existing courtesy light circuit so the door bowl lights turn on automatically whenever the door is opened or the interior lights activate. This creates a seamless, factory-integrated look and feel.
Step 6: Test Before Reassembly
Before snapping the door panel back into place, reconnect your battery (if disconnected) and open the door to see if the lights illuminate properly. Verify that both the illumination and any custom logo projection are correctly oriented.
Fix any issues—such as flickering or lights not turning on—by checking for loose connections, reversed polarity, or an inadequate ground connection.
Step 7: Reinstall the Door Panel
Once everything is working correctly, carefully reinstall the door panel. Align all clips and screws, and press firmly but gently back into place. Double-check that all switches, locks, and window controls still function properly. Make sure no wires are pinched between the panel and the door frame.
Repeat the process for each door. With four doors on a standard Escalade, patience will be your best friend. Take breaks as needed, and enjoy the process of transforming your SUV one door at a time.
Part 4: Creative Decoration Ideas for Your Escalade
Once your LED door bowl trims are installed, you have a canvas for creativity. Here are some decoration ideas to take your Escalade‘s interior to the next level:
1. Match Your Ambient Lighting Theme
If your Escalade already features factory or aftermarket ambient lighting (as many newer models do), coordinate your door bowl LED color with the rest of the cabin. For example, choose ice blue to match a cool, modern aesthetic, or warm white for a luxurious, understated glow.
2. Go Custom with a Logo
One of the most exciting features of these trim kits is the ability to customize the logo pattern. While many options display standard vehicle brand logos, you can take things further by ordering a fully custom design: your initials, a family monogram, a business logo, or even an abstract pattern. Imagine opening your Escalade door to see your own custom design glowing inside the handle bowl—that’s a level of personalization that turns heads.
3. Pair with Full LED Interior Conversion
Many Escalade owners have replaced all factory interior bulbs—map lights, vanity mirror lights, dome lights, cargo lights, and door lights—with bright, modern LEDs to create a cohesive, upgraded look throughout the cabin. Adding door handle bowl trims as the finishing touch brings everything together for a truly premium nighttime driving experience.
4. Multi-Color Fade Mode for Special Occasions
If you choose a multi-color LED option, the lights will automatically fade through different colors without a remote control. This creates a dynamic, party-like atmosphere inside the cabin. It’s a fantastic touch for special occasions: date nights, group road trips, or simply showing off your Escalade to friends and family.
Part 5: Maintenance and Care
LED door bowl trims are designed to be low-maintenance, but a few simple practices will keep them looking and performing their best:
- Clean the acrylic surface gently with a soft, damp microfiber cloth—avoid harsh chemicals or abrasive materials that could cloud or scratch the surface
- Periodically inspect the wiring and connections, especially after extreme temperatures or rough road conditions, to ensure everything remains secure
- Avoid excessive moisture exposure—although many LED components offer IP65 water resistance, the door handle bowl area can accumulate water during heavy rain or car washes
- If you ever notice flickering or dimming, double-check your ground connection and power source before assuming the LEDs themselves have failed
One Cadillac Forum member who completed a full LED conversion on their Escalade noted that the LED interior lighting was “very nice” and that they felt it should be offered as an option from the factory. That sentiment captures the essence of this upgrade: it fills a gap between what the factory provides and what enthusiasts truly want.
Final Thoughts
LED logo car inner door handle bowl trims offer one of the highest “wow factor per dollar“ ratios of any interior modification you can make to a Cadillac Escalade. It‘s a small detail, but small details are what separate a good build from a great one.
Whether you’re aiming for a cohesive factory-inspired upgrade, a bold custom logo statement, or a dynamic color-changing effect, this mod delivers on both style and function. Plus, with the Escalade‘s long-standing embrace of LED technology as part of its identity, you’re not just adding something new—you‘re extending a design tradition that Cadillac itself started.
So go ahead: open that door, watch the bowl light up, and enjoy the reaction from everyone who steps into your ride. Your Escalade deserves to shine from the inside out.