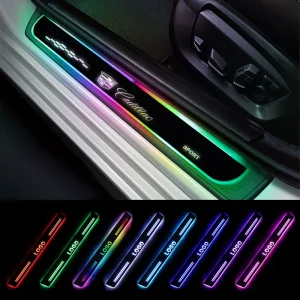


You know those little custom emblems you see on cars – a racing number, a club logo, a nickname, or just a cool design – and you think, “I want one of those.” Now imagine that same badge glowing at night. Not replacing your factory emblems, but adding a personal touch anywhere on your car’s body.
That’s exactly what 12V automotive LED logo badge plates are for. These small acrylic badges light up from behind with bright, even LED illumination. You can put any logo, text, or design on them – your name, your business, a favorite symbol – and mount them wherever you want: on the grille, fender, tailgate, dashboard, or even inside the cabin.
What Is a 12V Automotive LED Logo Badge Plate?
It’s a durable acrylic plate – with your custom logo or text etched or printed on the front. Behind it sits a small LED light board. When connected to your car’s 12V electrical system, the badge lights up, making your design glow evenly across the surface.
Think of it as a customizable, illuminated sticker that actually looks premium.
Unlike cheap LED strips or stick‑on lights, these badge plates are designed for automotive use: weatherproof, vibration‑resistant, and built to last through rain, snow, and car washes.
Key features:
– Runs on your car’s 12V system (hardwired, no batteries)
– Turns on with your parking lights, ignition, or a manual switch
– Fully customizable – any logo, text, or graphic
– Can be mounted anywhere on the car’s exterior or interior
– DIY‑friendly installation
Where Can You Mount It?
Almost anywhere. Because these badges are small and self‑contained, you’re not limited to factory emblem locations. Popular spots include:
- Front grille – as an accent alongside your main badge
- Fender – just behind the wheel, like classic side emblems
- Tailgate or trunk lid – below the main brand emblem
- Rear window area – on the glass or the body panel below
- Interior – on the dashboard, center console, or door panels
- Engine cover – for a custom show‑car touch
The adhesive backing or screw mounting makes it easy to attach to flat or slightly curved surfaces.
Fully Custom: Your Logo, Your Way
This is where it gets fun. You’re not stuck with a factory design. You can upload or describe any logo, and the badge plate will be made to your specs.
Customization ideas:
- Your name or nickname – “STEVE’S RIDE” or just “JAKE”
- Car club or team logo – show your crew pride
- Racing numbers – like vintage race cars
- Business logo – great for work trucks or mobile services
- Hobby symbols – fishing, hunting, golf, whatever you’re into
- Funny or personal text – “NOT A TESLA” or “V8 LIFE”
- Special edition tributes – recreate a limited‑run badge
The badge is typically made of frosted or clear acrylic with the design masked out, so light shines through only your logo. The result is a crisp, bright, professional look.
DIY Installation: Simple and Straightforward
You don’t need to be an auto electrician. These badge plates are designed for enthusiasts. Here’s what’s involved.
Tools You’ll Need:
- Wire strippers/crimpers (small ones)
- Posi‑tap or T‑tap connectors (no cutting required)
- Electrical tape or heat shrink tubing
- Zip ties
- Drill (only if you want to screw‑mount instead of using adhesive)
Step‑by‑Step:
- Choose Your Mounting Spot
Clean the area thoroughly with isopropyl alcohol. The badge comes with strong 3M automotive adhesive, so surface prep is critical.
- Plan the Wiring Route
The badge has two thin wires (red positive, black negative). You’ll run them from the badge location to a power source. Hide the wires along existing body seams, under trim, or behind panels.
- Tap into Power
You have a few options:
- Parking light circuit – badge lights with headlights (most common)
- Ignition circuit – badge lights whenever car is running
- Manual switch – full control, but requires running a switch inside
Use a posi‑tap to connect the red wire to your chosen 12V source. Connect the black wire to a clean, unpainted metal ground. Test the badge before final mounting.
- Mount the Badge
Peel the adhesive backing and press the badge firmly into place. Hold for 30 seconds. If you prefer a more permanent mount, drill small holes and use the included screws.
- Secure and Hide Wires
Zip‑tie wires away from heat, moving parts, and sharp edges. Tuck them neatly behind trim or under the fender liner.
- Enjoy Your Custom Glow
That’s it. Every time your lights come on, your personal badge lights up too.
Common Questions
Will it drain my battery?
No. The LEDs draw very little power – about the same as a single interior bulb. If you tap into the parking light circuit, the badge only lights when your lights are on, which means the engine is running (or at least the alternator is spinning). No battery drain.
Is it legal?
Yes, as long as you follow basic rules:
- On the front or sides: white, amber, or warm white is safe.
- On the front or sides: white, amber, or warm white is safe.
- On the rear: red only (unless your state allows white reverse lights).
No flashing, no blue or red emergency colors.
Can I put it on glass (like the rear window)?
Yes, but you’ll need to run wires carefully. Use clear adhesive and seal the entry point with silicone. Some owners mount them just below the glass on the body panel instead.
What if I want to remove it later?
The 3M adhesive can be removed with fishing line and a heat gun, similar to factory emblems. Any residue cleans off with adhesive remover. No permanent damage.
Why Add a Custom LED Badge?
Because it’s personal. Your car is already a reflection of you – why not make that reflection glow?
- It’s affordable – costs less than a tank of gas for most custom badges.
- It’s unique – no one else will have your exact design.
- It’s subtle but noticeable – people will ask, “Hey, where’d you get that?”
- It’s a conversation starter – at car meets, parking lots, even the drive‑thru.
And because you can install it yourself in under an hour, there’s no reason not to try.