


So you want to add a glowing Cadillac crest to the front of your ATS. Great choice—it’s one of those subtle upgrades that completely transforms the car’s nighttime presence. The good news? It’s a doable weekend project. The bad news? There’s no simple “plug-and-play” kit for most ATS models, so you’ll need to get a little creative.
Let’s walk through it step by step.
What You’ll Need
Parts:
OEM Cadillac ATS front emblem (part #23157689 for coupe, or verify fitment for your specific year and model)
Optional: blank aftermarket grille (Eliminator Truck Accessories or similar)
3M heavy-duty automotive adhesive tape
Small screws, nuts, and washers (#10-32 or M5 x 0.8 x 20mm)
JB Weld or similar two-part epoxy
LED light strip or pre-made illuminated emblem kit (if not purchasing a complete illuminated unit)
Wire taps, heat shrink tubing, electrical tape
Zip ties
Tools:
Socket set (for removing grille/bumper)
Trim removal tools (plastic pry bars)
Dremel or rotary tool with cutting/sanding attachments
Drill with small bits
Heat gun or hair dryer
Razor knife
Sandpaper
Multimeter (for testing electrical connections)
Isopropyl alcohol and microfiber cloth
Step 1: Understand What You’re Working With
Here’s the thing about ATS emblems: they weren’t designed to light up from the factory. So you have two paths.
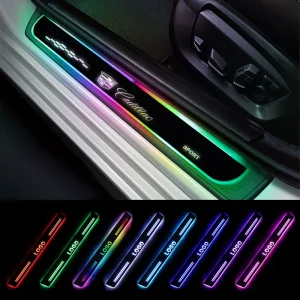
Path A: Buy an illuminated emblem kit (if available for your specific model). Some aftermarket companies offer complete units that include the LED lighting integrated into the badge.
Path B: Build your own by combining an OEM ATS emblem with an LED light strip behind it. This takes more work but gives you more control over the final look.
The steps below assume you’re going the custom route, but the mounting process applies either way.
Step 2: Remove the Old Grille and Emblem
On the ATS, the front grille needs to come off to access the emblem mounting points.
- Open the hood and remove any plastic covers or shrouds above the grille.
- Remove the front bumper cover (this varies by year—check YouTube for ATS-specific tutorials). You usually need to remove screws from the wheel wells, under the bumper, and along the top.
- Unbolt and remove the grille assembly from the bumper cover.
- Remove the old emblem. On the ATS grille, the emblem is typically held by plastic clips molded into the back of the grille . Use a Dremel or drill to carefully remove the clips and detach the emblem.
If you’re installing a blank aftermarket grille, skip this step—you’ll be mounting your new emblem onto a clean surface .
Step 3: Prepare Your New Emblem
This is where the forum wisdom comes in handy.
If You’re Building a Custom Illuminated Emblem
- Disassemble the emblem (optional). Some enthusiasts drill out the plastic welds on the back to separate the chrome or colored face from the backing . This gives you a larger surface area for mounting and lets you place the LED light strip behind the face.
- Trim the mounting tabs. The ATS emblem has plastic tabs on the back that won’t fit flush against a flat grille. Use a Dremel to trim them down until the emblem sits flat .
- Add mounting studs. Using JB Weld, epoxy small screws or bolts to the back of the emblem. A good setup uses three attachment points—one near the top center and two near the bottom corners . Let the epoxy cure fully (follow the JB Weld instructions).
- Scuff the surface. Use a razor knife to make shallow cross-hatch cuts on the areas where epoxy will be applied. This gives the adhesive something to grip .
- Install the LED light strip between the emblem face and the backing. Position it so the light distributes evenly across the crest.
If You Bought a Complete Illuminated Kit
Most pre-made illuminated emblems come with mounting studs or adhesive already applied. Skip the epoxy step and follow the kit’s instructions.
Step 4: Mount the Emblem to the Grille
- Test fit the emblem on your grille. Mark where the studs will go through.
- Drill holes in the grille at the marked locations.
- Apply 3M adhesive tape around the perimeter of the emblem backing for extra security.
- Position the emblem, push the studs through the holes, and secure with washers and lock nuts from behind . Tighten gently—overtightening can crack the emblem or grille.
If you’re using a blank aftermarket grille: you won’t need to trim anything—just drill, mount, and bolt on .
Step 5: Run the Wiring
This is the part that connects your emblem to power.
- Route the wires from the back of the emblem through the grille and into the engine bay. Follow existing wire looms and use zip ties to keep everything neat and away from moving parts.
- Choose a power source. For a front emblem that lights up with your parking lights or headlights, tap into the parking light circuit. You can find this wiring near the headlight assembly.
- Use a multimeter to confirm which wire gets 12V when the lights are on.
- Tap into the wire using a posi-tap or T-tap connector. Connect the emblem’s positive (red) wire here.
- Ground the negative (black) wire to a clean, unpainted metal bolt on the chassis.
- Secure and waterproof all connections with heat shrink tubing or electrical tape.
Pro tip: If you want the emblem to light up whenever the car is running (not just at night), tap into an ignition-switched fuse in the fuse box using an add-a-circuit adapter.
Step 6: Test and Reassemble
- Reconnect your battery (if you disconnected it—and you should have).
- Turn on your parking lights (or ignition, depending on your wiring choice) and verify the emblem lights up.
- If it doesn’t light: check your ground connection, verify your tap is secure, and test with a multimeter to ensure power is reaching the emblem.
- Once confirmed working, reassemble the grille, bumper cover, and any trim pieces you removed.
- Step back and admire. You’ve earned it.
Tips from the Trenches
These come straight from Cadillac enthusiasts who’ve done this mod:
- Know your part numbers. ATS front emblem part #23157689 is a common starting point . Verify fitment for your specific model year—some ATS trims have different grille contours.
- Expect to modify. These emblems rarely bolt directly on. Trimming tabs and custom mounting are almost always required .
- Use quality epoxy. JB Weld is forum-approved for a reason. It holds up to vibration and weather .
- Consider a blank grille. An aftermarket grille without the factory emblem indentation makes mounting much cleaner .
- Don’t forget the rear. While you’re at it, the rear ATS emblem (part #23157691) can be swapped too. On coupes, it may require heating and bending to match the trunk contour .
Final Thoughts
Installing an illuminated emblem on your Cadillac ATS isn’t a quick five-minute job—but it’s absolutely doable if you’re comfortable with basic tools and a little creativity. The result is a front end that looks modern, custom, and genuinely premium at night.
Take your time, follow the steps, and don’t be afraid to search for ATS-specific forum threads if you get stuck. There’s a whole community of Cadillac owners who’ve been down this road before.